Showing posts with label diy. Show all posts

Wednesday, December 11, 2013

DIY Halloween: Storage Bin Decoration

I mentioned in my spooky vase post that my husband and I were re-decorating our bedroom, so I'm starting with our closet, with little touches here and there..
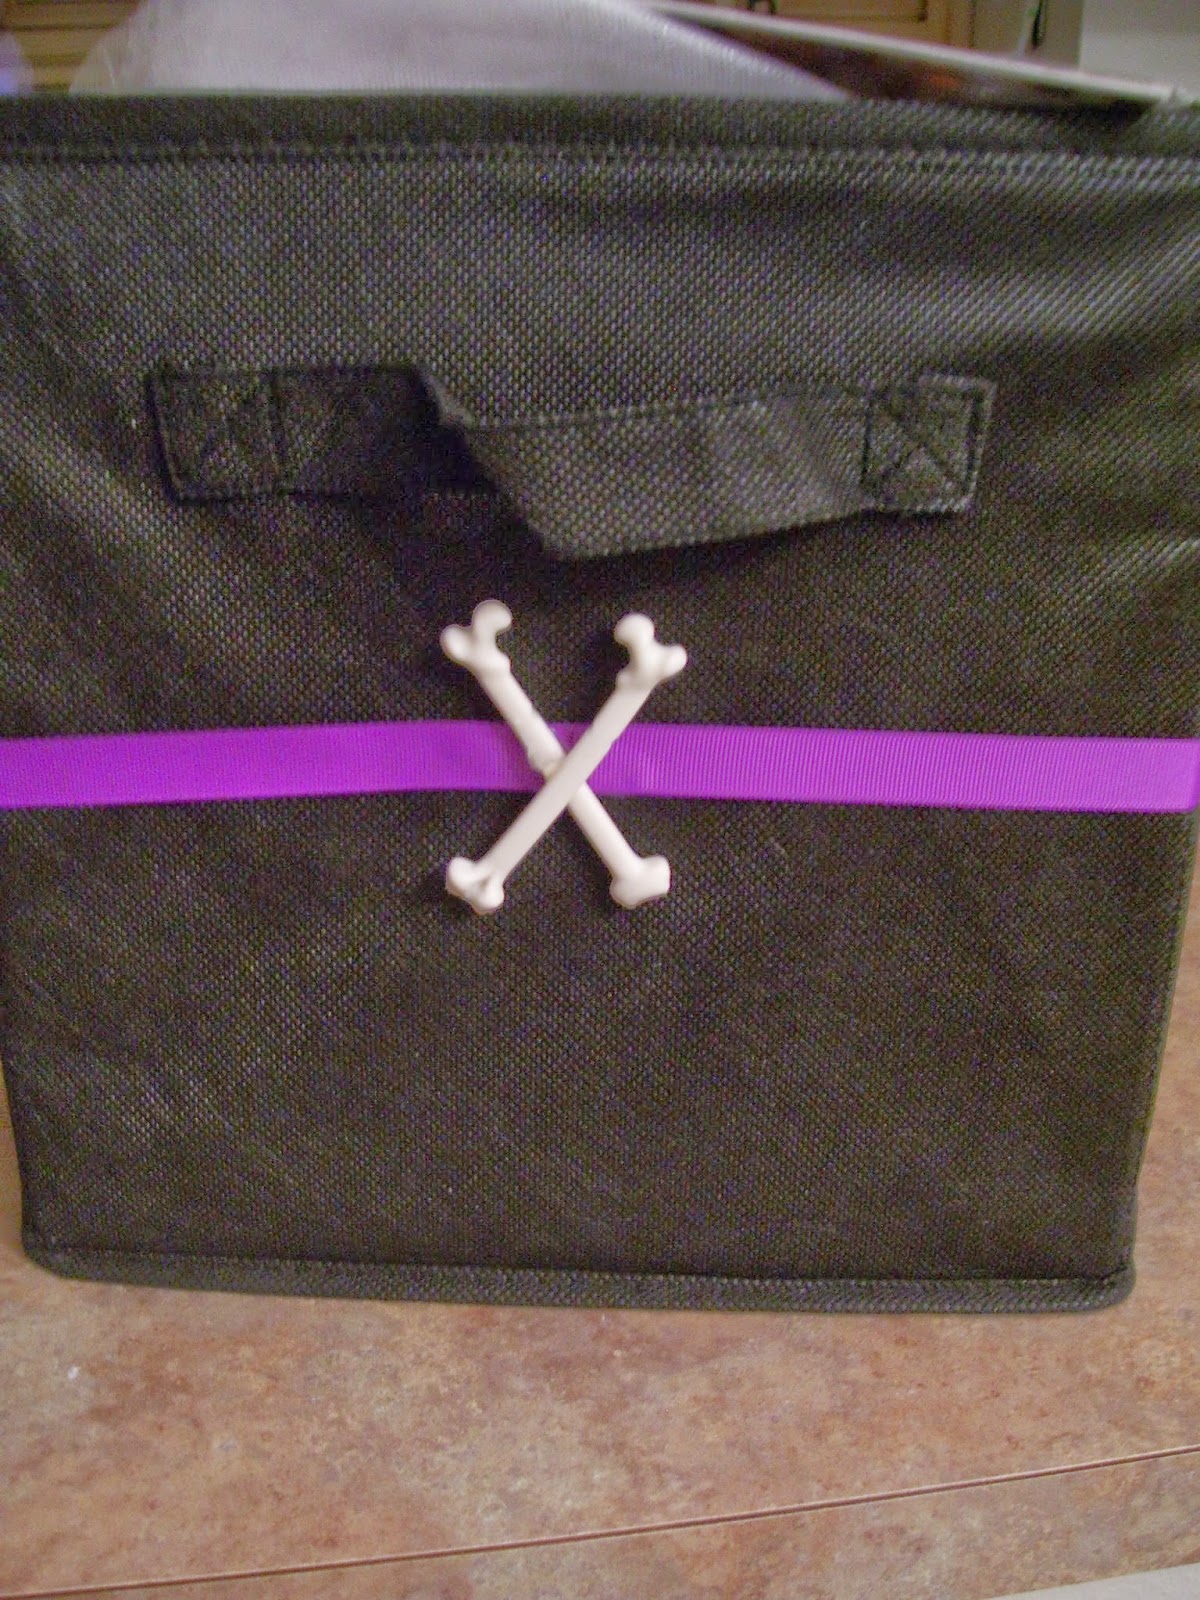
So we recently got a 5 shelf bookcase and we were able to move some things around, and my arts and crafts things were out and in the way so I said to myself ok I should get some plastic storage bins and keep it in the garage, so I was at work and someone left a black storage bin in my department and that's when it hit me, I could use these to store my arts and crafts materials and decorate the outside with a purple ribbon. So that's when we decided to do redecorate our room inspired by The Nightmare before Christmas... I talked to my husband about it shared my idea and he liked it, so I bought two of the bins the next day at work...
 
So for this storage bin decoration
you will need:
Storage bin,
ribbon,
decoration,
scissors,
hot glue gun,
tape
All of these can be modified to suit what you have.
 
Before
The first thing I did was take the ribbon and place some tape at the end of the ribbon to help me
decide where I want to place the ribbon.


So after I knew where I was going to place the ribbon, I took the tape off and frayed the edges of
ribbon..So it wouldn't be in my way...


So I put a dab of the glue on ribbon and placed it at the starting point and and applied gentle
pressure to get the ribbon to stick to the bin... I put a dab of glue in the middle of the ribbon
on all four sides..
 
the ribbon glued in place
 
So I took the pack of skeleton bones that I picked up at Party City for $2.99 and chose two,
when I filmed this I did not notice that when I glued the second one that it was bigger than
first so I had to take it off and place a same size bone lol..
 
 
So I glued both bones, and made sure they were the same distance apart and all that jazz.
 And here is the final product...


Wednesday, October 30, 2013

DIY Halloween: Spooky Vase

Halloween has always been my favorite time of the year, and I've always wanted to have our house decorated year around with Halloween decorations, now don't get me wrong I love Halloween decorations, but my mom not so much.. So we're re-decorating our bedroom and it's going to be inspired by The Nightmare before Christmas, it's always been mine and my husband's favorite movie.
So for this DIY Spooky Vase
you will need:
 
Vase,
White Artificial flowers,
Small toy spiders
Black Ribbon
Scissors
Hot Glue Gun

Optional:
Spider Webs
Reminder all of the above mentioned materials can be changed
to your liking... =)
 
I started by measuring out how much ribbon I would need for the neck of the vase, and set it aside.
Next I lit a match and frayed the edges of the ribbon, so it wouldn't come apart while working with
it. I took the hot glue gun and put a little dab of it at the end of the ribbon and placed that on the neck of the vase, wrapped it around the neck and placed a second dab of glue on top of the first. I had it overlapping a little bit which is fine, this part is covered by the little purple bat I placed on top.
the ribbon & purple bat added.
I only needed 3 bunches of the flowers, so I set the others aside for another project. I then arranged
the flowers to my liking and set them inside the vase and set that aside.
I grabbed the spider rings and began cutting the ring part off...
 
 
Spidey rings before...
 
Spidey ring after...
 
I cut 5 but I ended up putting 1 more because
there were some open spaces that I wasn't liking.
Now grab that vase again, before you start placing
the spiders on the flowers look at the flowers
and decide where you want them to go...
And after you decide starting putting them on the flowers...


And viola! it's finished... a shot from above
 
I know I mentioned in the video that I wouldn't
be putting in the spider webs, but I thought I'd put
them on there just to see how it looked and I loved it,
so I kept it...
 
I was originally going to use a skull ring and keep it with the two colors, but it didn't turn out well so I went with the purple bat, I love the way the end result came out, this would look really cute for a Halloween centerpiece or if you're like me and you want Halloween year around this is a cute idea, and inexpensive, the flowers were .97 each, the vase was$1.00, ribbon was $1.00 as well, and the pack of spider rings pack was 2.99 at Michael's so all together I spent about $10.00 which was awesome!... Thanks for reading.. link for video will be posted as soon as it's ready... =D
Til Next Time... 


Friday, January 18, 2013

DIY: Happy Memories Jar & Workout Tip Jar

DIY: Happy Memories Jar


Materials Needed:

*Jar (plastic or glass)
*Decorations (optional)
*Pens
*Paper
*box (base size on the notes that will be used)

*The Happy Memories Jar is a place where we can collect notes about happy/positive things that have happened to you.
*Maybe something you did that brightened someone’s day and made you smile, or getting an A on a paper/ report card, or finally doing something that you have been wanting to do, or an awesome birthday.
Example…..I recently ran into someone that I used to work with who I was thinking about and I put that in a note…

*It’s really easy to make a happy memories jar, you can use a glass jar or a plastic one like I did, and you can decorate it too, (it’s something that kids will love to do).
*You can make your own or one for the whole family (for the family make sure its in a place that everyone will see it)
*I like to put the date on the paper (optional)
*Keep a smal box with the paper and pens near the jar to make it easier to write the notes, so you   dont have to look for a pen and paper everytime you go to write a new note..


I love the happy memories jar for many reasons…

 1. Makes you focus on happy, positive stuff.

2. Focusing on happy, positive stuff lifts your spirits.

3. small things that brighten my day.

4. It makes me happy to write a new note and put it in the jar

5. It’s fun and it’s something that can be named anything you want and, can be just for  yourself or you and your family…

*2012 wasn’t a bad year but things that happened changed that year and the year before changed my view on things…and that you can’t let the little bad things get to you.

Fill it up the whole year and on new year’s eve this year open it up and look it all of the positive things that have happened to you this year, and all of the happy memories that were made…


DIY: Workout Tip Jar


Materials Needed :
 
*Jar (plastic or glass)
*Decorations (optional)
Calendar & stickers (optional)


Instead of calling it New year’s resolution I call it as a whole Operation Smile, a list of things to do that will make me smile…and yes losing some weight is one of them.. In past years by this time I had already quit. So I wanted something different for this year..and what could be a better incentive then to tip yourself $1 for each day that you workout....

*its easy to do, for everyday you work out you put a dollar in the jar.

*At the end of them month you can either let the money add up or buy yourself something.
*you can also decorate it like I did, (which is always fun for me..=D)
* you can also keep track of the days that you workout like I did on my calendar.
*keep it somewhere you will always be able to see it…
For me this is working and I don't see myself quiting like years past, I have to constantly change my workouts, one day I will do zumba the other belly dancing or Just dance on the Wii...they have to be fun, if not I know I will get bored and give up...but keeping a positive attitude has been a major factor for me...with the above mentioned workouts I look forward to them...

Here is the pictures of me before (March 06') and after (06') the 50lb weight loss...

                                                              Yes I am a Chargers Fan.. =)


Hope you like these two ideas....thanks so much for reading...=D