Showing posts with label violetmonroe118. Show all posts

Thursday, December 4, 2014

Epilepsy Awareness Day at Disneyland & Update

Hello lovelies...
November 6th 2014 was the second annual Epilepsy Awareness Day at Disneyland.
I had so much fun that day, we got there just in time for the last group picture
in Toontown. We made it with ten minutes to spare.. it gave me enough time
to catch my breath, after running to toontown.. 

As we waited I got a bit teary eyed, seeing all of the people in purple shirts..
As we started taking the group picture, a cast member ran and stood beside the
photographer and started waving her arms, I thought to myself, "OMG!! is a character
going to come and join our group pic... and YES! Pluto wanted to be in our 
group pic, so we took another set of group pics..

Photographer :
https://www.facebook.com/BrianKramerPhotography


We asked the photographer to take a pic of myself and my husband, and I love
way it came out..


Photographer:


Second Annual Epilepsy Awareness Day at Disneyland
& I am two years seizure free, I am so happy about that..
I ecstatic about, I'm making sure I'm eating right,
getting enough sleep and trying not to stress out to much.
Exercise has been such a big help,
Along with the above mentioned, I started clean eating, I cut out 
all processed foods, sodas, breads, pastas, & dairy.
Cutting out all of the above mentioned yummy foods has really
helped, I do still indulge every once in a while. My favorite
indulgence is the protein style burger at in-n-out...
so yummy!!

I consulted my doctor and she gave me the go ahead.
But to take notes in any changes, whether good or bad. 
I slept better, and my twitches (myoclonic jerks have stopped).
I do plan on going vegan sometime soon, but that's something I
have to consult my doctor about..

Please do not start any diet changes without first consulting your doctor. 

Another two years seizure free and I can start driving,
which I am looking forward to. 
 
Here is the link for the Epilepsy Awareness Day at Disneyland
Facebook page

https://www.facebook.com/epilepsyawarenessday2014


Thank you so much for reading...
til next time lovelies...


Wednesday, October 1, 2014

Product Review: Wet N Wild Mega Plump Mascara

Plump up the volume! Get 5 times the volume with this mascara that amplifies 
and plumps for plush, dramatic lashes. This volumizing formula delivers thicker lashes
in an instant. The voluminous brush wraps around the entire lash line for full
impact without the clumping.


Cruelty Free

Available in:
Very Black


http://wnwbeauty.com/product.php?cid=15&pid=88&subid=24


*This Review is for the Waterproof formula only.*

Packaging
I remember the old packaging of all of the wet n wild mascaras, and this one
was my least favorite, it was very weird to hold. Within recent years they
have changed the look of a lot of their makeup, and not only that but they
stepped up as far as the quality of the products.
I love this new packaging, it's much more sleek and easy to handle.


Product
 I'm going to start off with the wand, its a plastic wand,
I have no preference when it comes to wands, this one is a larger,
perfect for creating more voluminous lashes.
The formula of this mascara is a little bit dry.
There is a little bit of clumping but it's not a lot.
Does it give me 5x the volume ? No
It does give me noticeably more voluminous lashes
but I do not agree with the claim of 5x the volume.
The packaging claims 5x the volume, and the website claims 3x
the volume, which I completely agree with.


Quality control issue
I have purchased this mascara numerous times, on one occasion I bought
it and there wasn't enough product in the tube. I have only
experienced this once since I've started buying this mascara,
and it hasn't happened since.


Waterproof
As far as it's waterproof qualities, it gets the job done,
I like to layer my mascara and I always end with this one.
It's safe to say that there is a good chance that I'll cry whenever
we go to Disneyland, and every time I have my lashes still look good.

Would I recommend this product ?
Yes. It's a great waterproof mascara that gives
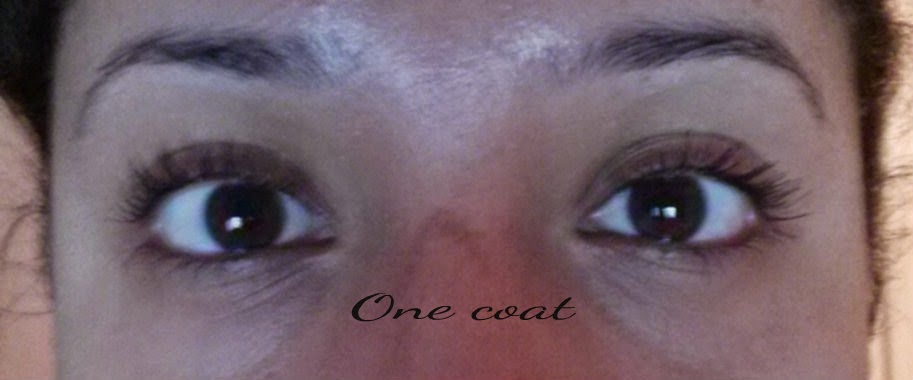
you noticeably fuller lashes.

Here are some pics of my lashes before/after using this mascara


If you have this mascara let me know in the comments how
it's worked out for you...

til next time lovelies....


Tuesday, January 14, 2014

Product Review: Desert Essence Coconut Hair Defrizzer and Heat Protector

Moisturizes hair and restores healthy luster.

Leaves hair smooth and soft.
Protects hair against heat styling damage.

A unique blend of 4 desert botanicals and coconut oil extracts
help prevent and repair damage to hair leaving hair
smooth and healthy. This lightweight spray penetrates hair cuticle
and conditions from within, protecting the surface of the hair
against further damage. Jojoba seed extract conditions and
adds shine.

Jojoba and Coconut Extracts help nourish brittle hair and condition
dry scalp restoring moisture.
Cactus and Agave drench hair in moisture and hep restore a healthy luster

Panthenol or Provitamin B5 penetrates and seals hair surface to protect
it from styling damage.

$9.99
8.5 fl.oz
100% Vegan
Wheat, Glutten and Silicone Free.


Scent:
*I personally love the scent of this, I'm a sucker for anything Pineapple or Coconut scented.
*It is a bit strong at first, and the scent does fade but it's a muted scent, and it does linger for a
  bit, and it does fade away.
*If you are sensitive to smells I would smell this first.

Product:I'm dividing this in two parts since its a hair defrizzer and heat protector.
Heat Protector:*As a heat protector it works great, I saw less split ends, I wasn't curling/straightening my hair
  as often and I wasn't using a blow dryer at all.
*It doubles as a natural leave in hair conditioner with its natural coconut, jojoba oils.
*as far as heat protectant, I feel it does work, it does help protect against split ends,
  but I don't believe it can repair them, I've always believed that there is no repairing them.
 *When used consistently your hair's natural shine does come through.
Defrizzer:
*As a defrizzer I do feel it works, if you are looking for something to completely get rid of
  frizzy hair then and there this isn't it.
*If you use this product over time, and consistently,now I'm not saying straighten your hair
  everyday but even just using it as a leave-in conditioner after you get out of the shower.
*My hair can be pretty unruly, and using this along with other products has helped.
*Using this alone will help you but when its used in combination of other products to help
   tame the unruly frizzies, I believe it does help.

On days that I don't use any heat on my hair I spray this after I get out of the shower and let my
hair air dry, once in a while I'll give myself a blow out, I'm trying not to use my curling iron as much.
this gives my hair a shine, which is what really drew me to this product, well that and it's cruelty free. 


Wednesday, December 11, 2013

DIY Halloween: Storage Bin Decoration

I mentioned in my spooky vase post that my husband and I were re-decorating our bedroom, so I'm starting with our closet, with little touches here and there..
So we recently got a 5 shelf bookcase and we were able to move some things around, and my arts and crafts things were out and in the way so I said to myself ok I should get some plastic storage bins and keep it in the garage, so I was at work and someone left a black storage bin in my department and that's when it hit me, I could use these to store my arts and crafts materials and decorate the outside with a purple ribbon. So that's when we decided to do redecorate our room inspired by The Nightmare before Christmas... I talked to my husband about it shared my idea and he liked it, so I bought two of the bins the next day at work...
 
So for this storage bin decoration
you will need:
Storage bin,
ribbon,
decoration,
scissors,
hot glue gun,
tape
All of these can be modified to suit what you have.
 
Before
The first thing I did was take the ribbon and place some tape at the end of the ribbon to help me
decide where I want to place the ribbon.


So after I knew where I was going to place the ribbon, I took the tape off and frayed the edges of
ribbon..So it wouldn't be in my way...


So I put a dab of the glue on ribbon and placed it at the starting point and and applied gentle
pressure to get the ribbon to stick to the bin... I put a dab of glue in the middle of the ribbon
on all four sides..
 
the ribbon glued in place
 
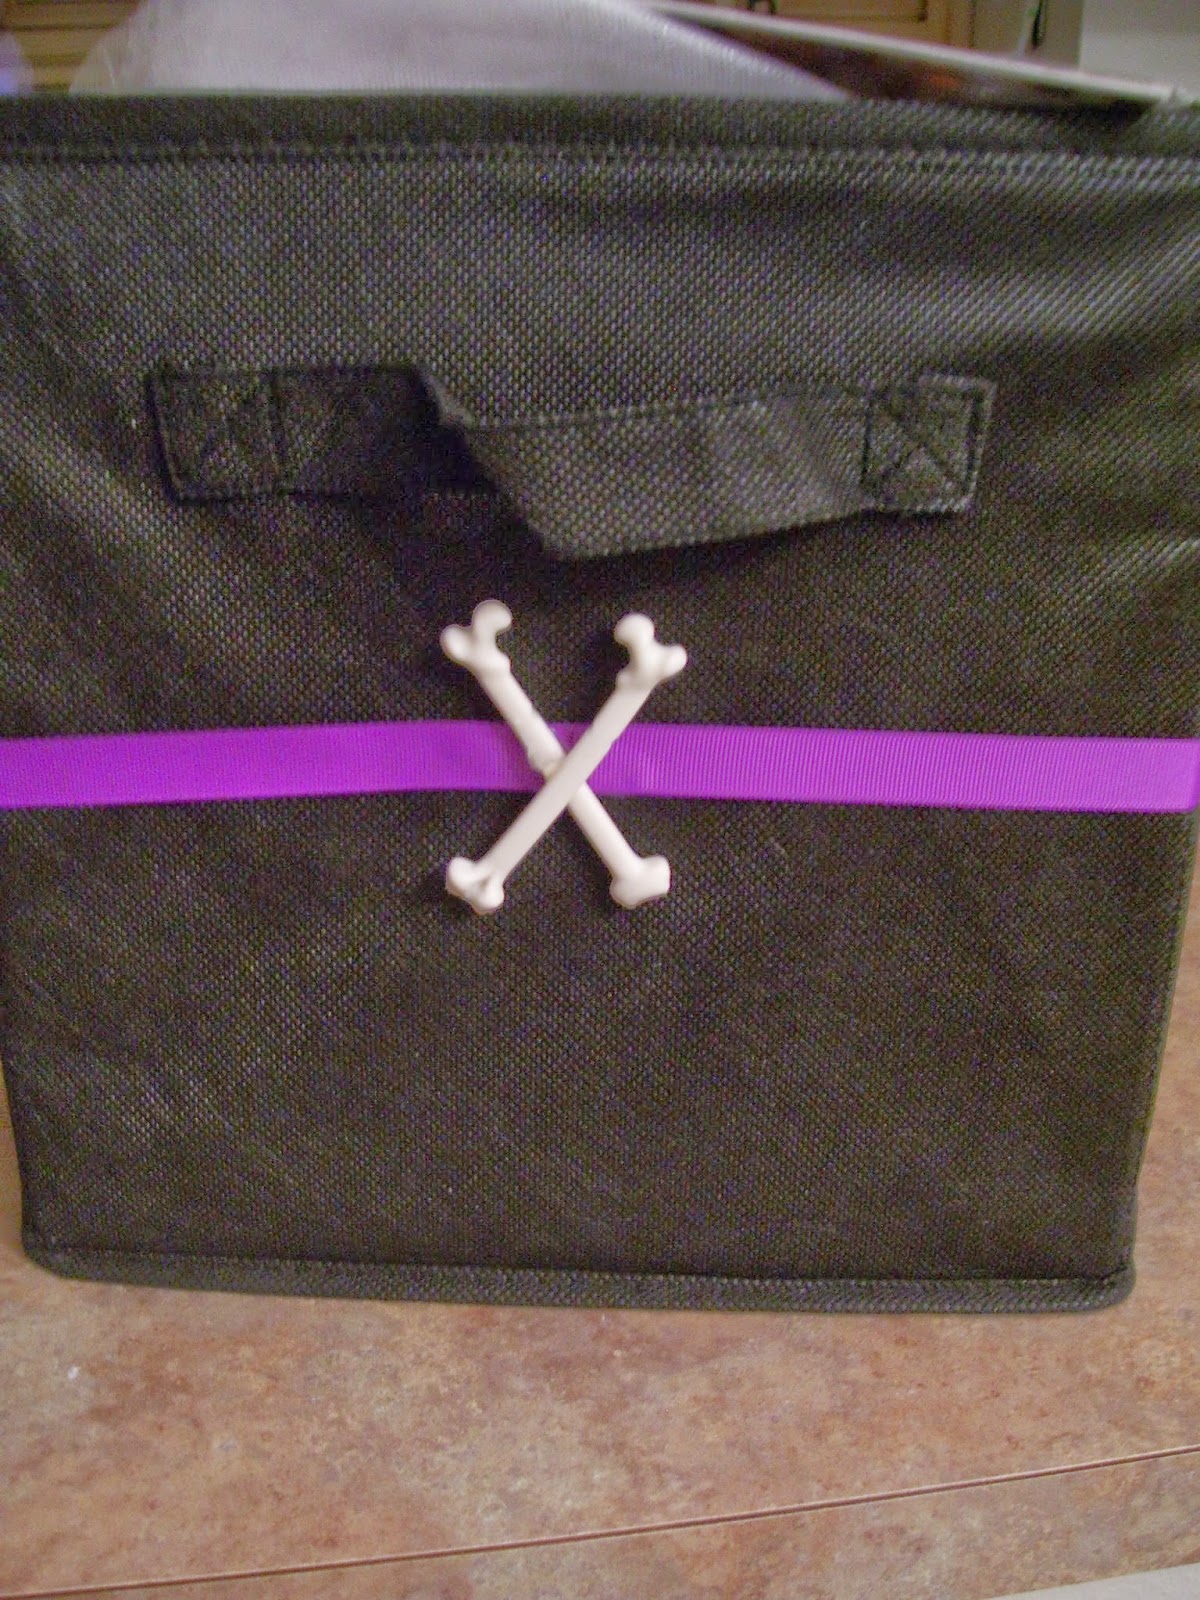
So I took the pack of skeleton bones that I picked up at Party City for $2.99 and chose two,
when I filmed this I did not notice that when I glued the second one that it was bigger than
first so I had to take it off and place a same size bone lol..
 
 
So I glued both bones, and made sure they were the same distance apart and all that jazz.
 And here is the final product...


Friday, November 29, 2013

Meeko Inspired Disneybound

So Meeko has always been on of my favorite Disney characters, he's adorable, and he can
braid hair, every single time I've tried to braid my hair, I end up frustrated, mad and wanting
to punch something so having my own meeko to braid my hair would be awesome..

So I had the shirt in my closet for about a year, when I bought it, it was too tight so I started
buying clothes for other disneybounds and forgot about the shirt, I had the gray pants and
couldn't fit into them and just out of curiosity I tried them on and they fit, so I tried the top
and it fit.. I told my mom that I was able to fit into both the top and jeans, so to celebrate
my weightloss she bought me some boots.... (thanks momma!!)
 
Where I bought everything..
 
Black Beanie, Hot topic = $9.99
Top, Kmart = $14.99
Jeans, DD's Discounts $14.99
Boots, Kmart $34.99
Ring, Hot topic $4.99
Purse, Disney Store $24.50

 
I had to include meeko in the pic...
 
 
Ok so the necklace I got the
black chain at Disneyland with these
mickey charms, so I took off the charms and used the
chain, and the meeko charm was on a vintage
Pocahontas charm bracelet I found at frank and sons
for a $1.00 and I had my husband take it off of the bracelet.
 
 
For my nails I decided to go with black,
and painted one nail in Wet N Wild's Silvivor,
and after I had finished putting the top coat on
I realized I had O.P.I skull and crossbones and I
re-did the ring finger with that color. I like the way Silvivor
looks but I love the way skull and crossbones looks..
 
 
Here is a little collage I put together..
Hope you enjoyed this disneybound..
Til Next Time..
=D
 

Wednesday, October 30, 2013

DIY Halloween: Spooky Vase

Halloween has always been my favorite time of the year, and I've always wanted to have our house decorated year around with Halloween decorations, now don't get me wrong I love Halloween decorations, but my mom not so much.. So we're re-decorating our bedroom and it's going to be inspired by The Nightmare before Christmas, it's always been mine and my husband's favorite movie.
So for this DIY Spooky Vase
you will need:
 
Vase,
White Artificial flowers,
Small toy spiders
Black Ribbon
Scissors
Hot Glue Gun

Optional:
Spider Webs
Reminder all of the above mentioned materials can be changed
to your liking... =)
 
I started by measuring out how much ribbon I would need for the neck of the vase, and set it aside.
Next I lit a match and frayed the edges of the ribbon, so it wouldn't come apart while working with
it. I took the hot glue gun and put a little dab of it at the end of the ribbon and placed that on the neck of the vase, wrapped it around the neck and placed a second dab of glue on top of the first. I had it overlapping a little bit which is fine, this part is covered by the little purple bat I placed on top.
the ribbon & purple bat added.
I only needed 3 bunches of the flowers, so I set the others aside for another project. I then arranged
the flowers to my liking and set them inside the vase and set that aside.
I grabbed the spider rings and began cutting the ring part off...
 
 
Spidey rings before...
 
Spidey ring after...
 
I cut 5 but I ended up putting 1 more because
there were some open spaces that I wasn't liking.
Now grab that vase again, before you start placing
the spiders on the flowers look at the flowers
and decide where you want them to go...
And after you decide starting putting them on the flowers...


And viola! it's finished... a shot from above
 
I know I mentioned in the video that I wouldn't
be putting in the spider webs, but I thought I'd put
them on there just to see how it looked and I loved it,
so I kept it...
 
I was originally going to use a skull ring and keep it with the two colors, but it didn't turn out well so I went with the purple bat, I love the way the end result came out, this would look really cute for a Halloween centerpiece or if you're like me and you want Halloween year around this is a cute idea, and inexpensive, the flowers were .97 each, the vase was$1.00, ribbon was $1.00 as well, and the pack of spider rings pack was 2.99 at Michael's so all together I spent about $10.00 which was awesome!... Thanks for reading.. link for video will be posted as soon as it's ready... =D
Til Next Time... 


Tuesday, April 16, 2013

Wet 'n' Wild Intuitive Blend Shade Adjusting foundation + Primer

This revolutionary shade-adjusting technology
starts out white and adjusts to match
your exact skin tone.
Unique primer properties smooth skin
texture for perfect application.
 
Available in
 
Fair
Light
Medium
 Tan
 
1oz

Cruelty Free


Packaging:
*Squeeze tube bottle
*Color of outside packaging mimicks product.
 
Scent:
*Pleasant smell, I personally love the smell of this.
*It does linger for a bit and fades after a bit.
 
Product:
*Has a liquid consistency
*small white beads (color beads)
*Works best when fingers used to apply it to the face.
   I have tried it with a beauty sponge, but I feel I can break down the color beads
   better with my hands then with the beauty sponge or a stippling brush..
*Light coverage
*Can also be used just as a primer.
*I apply it in sections, I start with my neck and work my way up.
                                     (I'll explain in the cons why)
 
Cons:
*Product dries, I don't want to say it dries to fast, but between this and
  New York Color's Skin Matching Foundation, New York Colors foundation
  dries faster than this.
*If you have some on your hands that has dried and you apply it to your face
  it will clump up.
 
Would I recommend this:
* yes I would recommend this, if you have a sensitive face
   (Before I bought this I researched it and some had a burning sensation,
    so air on the side of caution)
*For some the light coverage is a con.
  (I have some acne scarring and I use a concealer before hand)

I hope you found this review helpful...thanks so much for reading....and watching...
Til Next Time...=D